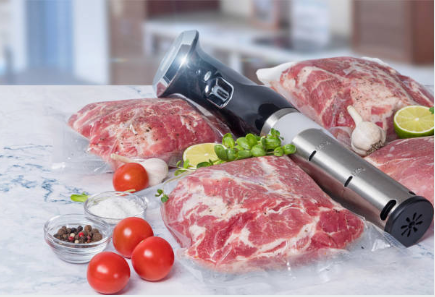
Seal the Deal: How to Perfectly Vacuum Seal Your Catch

Vacuum sealing fish is hands down one of the best ways to keep your catch fresh and flavourful for months. But if you’ve ever tried it before, you’ll know it can be a bit tricky because of all that moisture. Don’t worry – we’ve got you covered. Here are some foolproof tips to help you vacuum seal fish easily and effectively.
Preparing Fish for Vacuum Sealing
The key to perfectly vacuum-sealed fish starts with proper preparation. Here’s how to do it right:
- Keep It Dry: If you can, avoid washing the fillets altogether. Less moisture means a better seal. Use paper towels to gently pat the fillets dry before bagging them.
- Chill Before Sealing: For even better results, place fish fillets in the fridge for a few hours before vacuum sealing. This helps dry them out slightly, making the sealing process smoother and more effective.
- If You Must Wash, Do It Right: Sometimes, you just need to rinse your fish. In that case, always use salt water, not fresh. After washing, drain the fillets thoroughly and pat them dry with paper towels. This helps prevent any excess liquid from messing with your seal.
How to Vacuum Seal Fish Without the Mess
Fish can be a bit tricky to vacuum seal because of its high liquid content. But with these simple tips, you’ll get perfect results every time:
- Use a Paper Towel Trick: Place a folded paper towel inside the bag, above the fish, and across the width of the bag. This trick absorbs any moisture that tries to creep up during sealing. (Check your vacuum sealer manual or our FAQs page for more details.)
- Leave Some Room: Always leave about 50mm of space between the fillets and the sealing area. This “window” lets you see if any liquid is getting close to the seal. Don’t try to save on bag material by making the bags too small – the extra space is worth it!
- Spread Out the Fillets: Make sure you don’t overfill the bag. Lay the fillets flat and spread them out. This reduces compression, minimizes liquid buildup, and helps the fish freeze and defrost evenly.
- Long and Thin for The Win: When sealing foods with high liquid content (like fish), long and skinny bags are better than short and wide ones. This shape helps control the flow of liquid during sealing.
And remember: When vacuum sealing anything, cold is key! Always vacuum seal food when it’s cold or at room temperature. Warm food creates condensation inside the bag and can cause the vacuum to release over time. But in this case, if your catch is warm when you’re sealing it… well, let’s just say that’s not a great sign (you want fresh, not funky).
What to Do If Liquid Gets on the Sealing Band
Even with the best prep, sometimes liquid can sneak up to the sealing area. Here’s what to do:
- Smart Sealing Trick: Before putting wet food into the bag, fold the top edge outward (like folding down a sock). This keeps the sealing area dry and free from any liquid, ensuring a strong, reliable seal.
- Double Seal for Safety: If you notice moisture near the seal, just run a second seal above the first one. Even if the first seal looks fine, a backup seal ensures it won’t come undone in the freezer.
Tips for Vacuum Sealing Shellfish
Shellfish are a bit more delicate, so they need a slightly different approach:
- Use Manual Mode: To avoid crushing delicate shellfish, use the manual mode on your vacuum sealer. This gives you more control over the vacuum strength.
- Flash Freeze First: If you want the longest possible freezer shelf life, place the shellfish in the freezer for 1-2 hours before vacuum sealing. You can also flash freeze them on a tray before bagging and sealing. Doing this means you can vacuum the frozen seafood in automatic mode without squashing it. This keeps excess liquid at bay and makes them easier to store.
Choosing the Right Vacuum Rolls and Bags
Not all vacuum bags are created equal – some are better suited for sealing fish than others. Here’s what to look for:
- Top-Quality Materials: Choose rolls and bags made from BPA-free, multi-layer vacuum film that’s safe for freezing, cooking, and reusing.
- Built to Last: Go for bags with a strong inner layer made from food-grade polyethylene. This gives the bags extra flexibility and toughness. Even when frozen, these bags stay strong and secure without tearing or leaking.
- Embossing: Do not use vacuum bags with straight line embossing as this allows liquids to travel quickly up the lines. Also straight lines can get blockages trapping air. Use embossed bags with a criss cross dimple pattern for better vacuum results.
Top Tip: All ZeroPak bags meet these high standards, so you can save time searching for the right one.
Bonus Tips: Reuse Vacuum Bags for Fishing Trips
Don’t toss those used vacuum bags just yet – they can come in handy for your next fishing trip:
- Perfect for Bait and Gear: Save the bags from your fillets and reuse them for bait. Vacuum-sealed bait stays fresher longer, resists contamination, and refreezes well if unused. You can also wash the bags and use them to store fishing gear.
- Make Your Own Ice Packs: Need ice packs for your chilly bin? Just fill vacuum bags with water and seal them (don’t vacuum). These reusable ice packs fit perfectly in your bin and can be used over and over. For salt ice, fill the bag with pre-frozen cubes, vacuum seal it, and let it melt – it’s a super easy way to make custom-sized ice packs that stack neatly.
Whether you’re new to vacuum sealing or a seasoned pro, the right techniques and equipment make all the difference. With these tips, you can easily preserve your fish’s flavour and freshness for months.
Happy sealing!